

この記事には広告を含む場合があります。
記事内で紹介する商品を購入することで、当サイトに売り上げの一部が還元されることがあります。
プロジェクト管理ツールはたくさんありますが、今回は仕事で必要に迫られたので(笑)。
AWS上のEC2にRedmineを立てて使ってみたいと思います。
Redmineはオープンソースのプロジェクト管理ソフトウェアです。 タスク管理、進捗管理、情報共有が行えます。 ソフトウェア開発やwebサイト制作等のITプロジェクトをはじめ、汎用性が高いため幅広い用途に活用できます。
今回は手順が長いので心して作業に取り掛かって下さいね。
システム要件
とあるプロジェクトを立ち上げるに伴い、何処からでもアクセス出来る環境にプロジェクト管理ツールを構築したい。
| プラットフォーム: | EC2(AWS) |
| インスタンスタイプ: | t2.small |
| OS: | CENTOS7 |
| ミドル: | Reamine3.0 |
構築手順
・SELinuxを無効化
# vi /etc/sysconfig/selinux
SELINUX=enforcing
↓
SELINUX=disabled
・firewalld無効化
# systemctl disable firewalld・OS再起動
# shutdown -r now・開発ツール(Cコンパイラ等)のインストール
# yum -y groupinstall "Development Tools"・RubyとPassengerのビルドに必要なヘッダファイルなどのインストール
yum -y install openssl-devel readline-devel zlib-devel curl-devel libyaml-devel libffi-devel・MariaDBとヘッダファイルのインストール
# yum -y install mariadb-server mariadb-devel・Apacheとヘッダファイルのインストール
# yum -y install httpd httpd-devel・ImageMagickとヘッダファイル・日本語フォントのインストール
# yum -y install ImageMagick ImageMagick-devel ipa-pgothic-fonts・Rubyのインストール
# curl -O http://cache.ruby-lang.org/pub/ruby/2.2/ruby-2.2.2.tar.gz
# tar xvf ruby-2.2.2.tar.gz
# cd ruby-2.2.2
# ./configure --disable-install-doc
# make && make install
時間がかかるが、気長に待つ・・・
・Rubyインストール確認
# ruby -v
ruby 2.2.2p95 (2015-04-13 revision 50295) [x86_64-linux]
・bundlerのインストール
# gem install bundler --no-rdoc --no-ri
Fetching: bundler-1.9.4.gem (100%)
Successfully installed bundler-1.9.4
1 gem installed
・MariaDBの設定
デフォルトキャラクタセットをutf8に設定
/etc/my.cnfに下記を追記(場所に注意)
# instructions in http://fedoraproject.org/wiki/Systemd

character-set-server=utf8 #★

[mysqld_safe]
log-error=/var/log/mariadb/mariadb.log
pid-file=/var/run/mariadb/mariadb.pid

#
# include all files from the config directory
#
!includedir /etc/my.cnf.d
[mysql] #★
default-character-set=utf8 #★
・MariaDB起動&自動起動
# service mariadb start
Redirecting to /bin/systemctl start mariadb.service
[root@ip-10-0-0-181 ruby-2.2.2]# systemctl enable mariadb
ln -s '/usr/lib/systemd/system/mariadb.service' '/etc/systemd/system/multi-user.target.wants/mariadb.service'
・UTF8設定が反映されていることの確認
# mysql -uroot
MariaDB [(none)]> show variables like 'character_set%';
+--------------------------+----------------------------+
| Variable_name | Value |
+--------------------------+----------------------------+
| character_set_client | utf8 |
| character_set_connection | utf8 |
| character_set_database | utf8 |
| character_set_filesystem | binary |
| character_set_results | utf8 |
| character_set_server | utf8 |
| character_set_system | utf8 |
| character_sets_dir | /usr/share/mysql/charsets/ |
+--------------------------+----------------------------+
8 rows in set (0.00 sec)

MariaDB [(none)]> exit
・rootユーザーのパスワード変更・匿名ユーザー削除ほかセキュリティ向上
# mysql_secure_installation
/bin/mysql_secure_installation: line 379: find_mysql_client: command not found

NOTE: RUNNING ALL PARTS OF THIS SCRIPT IS RECOMMENDED FOR ALL MariaDB
SERVERS IN PRODUCTION USE! PLEASE READ EACH STEP CAREFULLY!

In order to log into MariaDB to secure it, we'll need the current
password for the root user. If you've just installed MariaDB, and
you haven't set the root password yet, the password will be blank,
so you should just press enter here.

Enter current password for root (enter for none):
OK, successfully used password, moving on...

Setting the root password ensures that nobody can log into the MariaDB
root user without the proper authorisation.

Set root password? [Y/n] y
New password: 任意のパスワード
Re-enter new password: 任意のパスワード
Password updated successfully!
Reloading privilege tables..
... Success!

By default, a MariaDB installation has an anonymous user, allowing anyone
to log into MariaDB without having to have a user account created for
them. This is intended only for testing, and to make the installation
go a bit smoother. You should remove them before moving into a
production environment.

Remove anonymous users? [Y/n] y
... Success!

Normally, root should only be allowed to connect from 'localhost'. This
ensures that someone cannot guess at the root password from the network.

Disallow root login remotely? [Y/n] y
... Success!

By default, MariaDB comes with a database named 'test' that anyone can
access. This is also intended only for testing, and should be removed
before moving into a production environment.

Remove test database and access to it? [Y/n] y
- Dropping test database...
... Success!
- Removing privileges on test database...
... Success!

Reloading the privilege tables will ensure that all changes made so far
will take effect immediately.

Reload privilege tables now? [Y/n] y
... Success!

Cleaning up...

All done! If you've completed all of the above steps, your MariaDB
installation should now be secure.

Thanks for using MariaDB!
・Redmine用データベースとユーザーの作成
# mysql -uroot -p
MariaDB [(none)]> create database db_redmine default character set utf8;
MariaDB [(none)]> grant all on db_redmine.* to user_redmine@localhost identified by '任意のパスワード';
MariaDB [(none)]> flush privileges;
MariaDB [(none)]> exit
・Redmineのインストール
Redmineのダウンロード
下記のページから最新のRedmineのtarball(.tar.gz)をダウンロードしてください。
http://www.redmine.org/projects/redmine/wiki/Download
# curl -O http://www.redmine.org/releases/redmine-3.0.1.tar.gz・Redmine展開と配置
# tar zxvf redmine-3.0.1.tar.gz
# mv redmine-3.0.1 /var/lib/
# ln -s redmine-3.0.1 redmine
・データベースへの接続設定
以下の内容でRedmineのインストールディレクトリ(例: /var/lib/redmine)以下に config/database.yml を作成
# cat << EOF > /var/lib/redmine/config/database.yml
production:
adapter: mysql2
database: db_redmine
host: localhost
username: user_redmine
password: "設定したパスワード"
encoding: utf8
EOF
設定ファイル config/configuration.yml の作成
以下の内容でRedmineのインストールディレクトリ(例: /var/lib/redmine)以下に config/configuration.yml ファイルを作成
# cat << EOF > /var/lib/redmine/config/configuration.yml
production:
email_delivery:
delivery_method: :smtp
smtp_settings:
address: "localhost"
port: 25
domain: "example.com"

rmagick_font_path: /usr/share/fonts/ipa-pgothic/ipagp.ttf
EOF
・Gemパッケージのインストール
# bundle install --without development test --path vendor/bundleセキュリティトークン作成
セッションデータ改竄防止用鍵の生成
# bundle exec rake generate_secret_tokenデータベースのテーブル作成
# RAILS_ENV=production bundle exec rake db:migrate初期データの登録
# RAILS_ENV=production REDMINE_LANG=ja bundle exec rake redmine:load_default_dataPassengerのインストール
# gem install passenger --no-rdoc --no-riPassengerのApache用モジュールのインストール
# passenger-install-apache2-module時間がかかるが、気長に待つ・・・
画面に従いインストールを行い、表示されるコードを控えておく!(環境によって異なるため)
例)
PassengerRoot /usr/local/lib/ruby/gems/2.2.0/gems/passenger-5.0.6
PassengerDefaultRuby /usr/local/bin/ruby
・Apache設定
Passengerの設定を追加
以下の内容で/etc/httpd/conf.d/redmine.conf を作成
# vi /etc/httpd/conf.d/redmine.conf

# Passengerの基本設定
# passenger-install-apache2-module --snippet を実行して表示される設定を使用。
# 環境によって設定値が異なりますので以下の3行はそのまま転記しないでください。
LoadModule passenger_module /usr/local/lib/ruby/gems/2.2.0/gems/passenger-5.0.6/buildout/apache2/mod_passenger.so
PassengerRoot /usr/local/lib/ruby/gems/2.2.0/gems/passenger-5.0.6
PassengerDefaultRuby /usr/local/bin/ruby

# Passengerが追加するHTTPヘッダを削除するための設定(任意)。
#
Header always unset "X-Powered-By"
Header always unset "X-Rack-Cache"
Header always unset "X-Content-Digest"
Header always unset "X-Runtime"

# 必要に応じてPassengerのチューニングのための設定を追加(任意)。
# 詳しくはPhusion Passenger users guide(http://www.modrails.com/documentation/Users%20guide%20Apache.html)をご覧ください。
PassengerMaxPoolSize 20
PassengerMaxInstancesPerApp 4
PassengerPoolIdleTime 864000
PassengerHighPerformance on
PassengerStatThrottleRate 10
PassengerSpawnMethod smart
PassengerFriendlyErrorPages off
・RedmineのCSSや画像へのアクセスを許可
/etc/httpd/conf.d/redmine.confに下記を追記
<Directory "/var/lib/redmine/public>
Require all granted
・Apacheの起動および自動起動の設定
# service httpd start
# systemctl enable httpd
・Apache上のPassengerでRedmineを実行するための設定
# chown -R apache:apache /var/lib/redmine・webサーバをRedmine専用として使用
/etc/httpd/conf/httpd.confを下記のように編集
DocumentRoot "/var/www/html"
↓
DocumentRoot "/var/lib/redmine/public"
apacheテスト&再起動
# service httpd configtest# service httpd configtest
Syntax OK
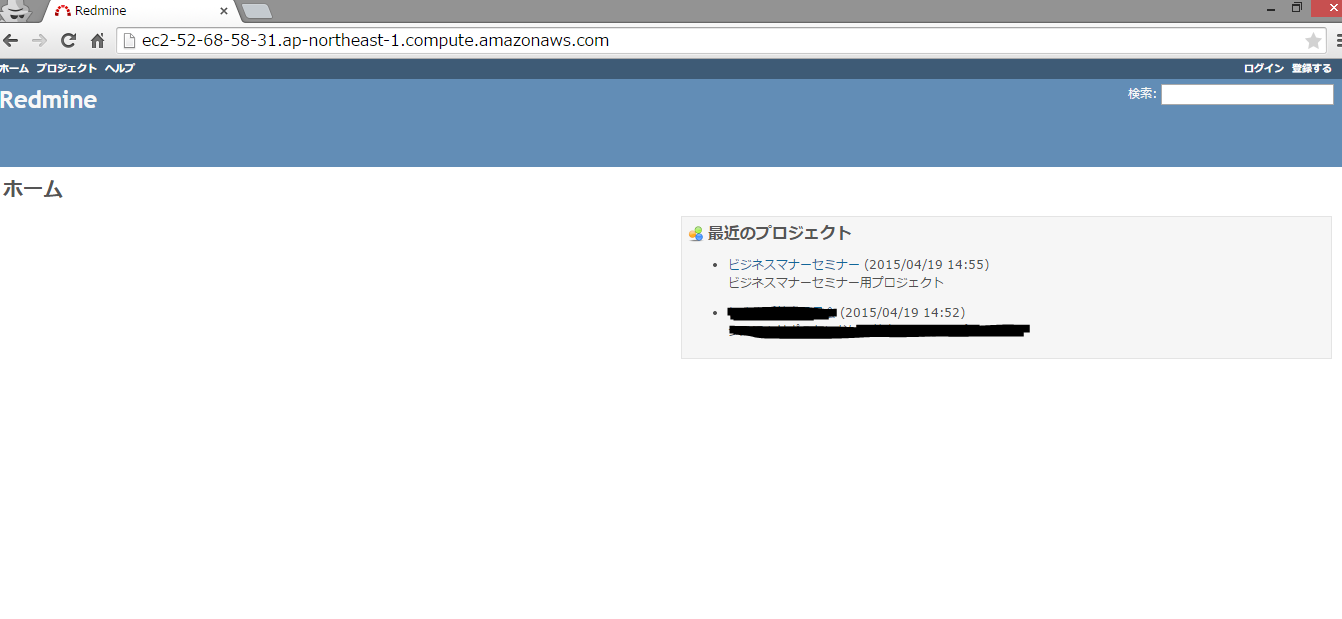
# service httpd restart・アクセス確認
対象ホストにHTTPにて接続(セキュリティグループで「http」許可する事)
ログインID、初期パスワードとも「admin」
・インストール完了後の初期設定
下記URLを参照し、初期設定を行う
今回はAWSのEC2上にredmineをインストールするところまでを書きました。
手順が長いので大変ですが、何とか起動させる事が出来て良かったです。
これから使っていく上で操作方法が分かってくれば、続きの記事を書きたいと思います。
それではまた。
# make && make install
は下記に訂正したほうがいいかと思います
# make && make install
ご指摘ありがとうございます!
修正させて頂きました。